Set up Gmail multiple inbox views

Quick setup guide – Google Workspace (web browser only)

Result: emails from one sender get their own label and their own section next to your Inbox. Example label: After Hours. Use your own name.

1

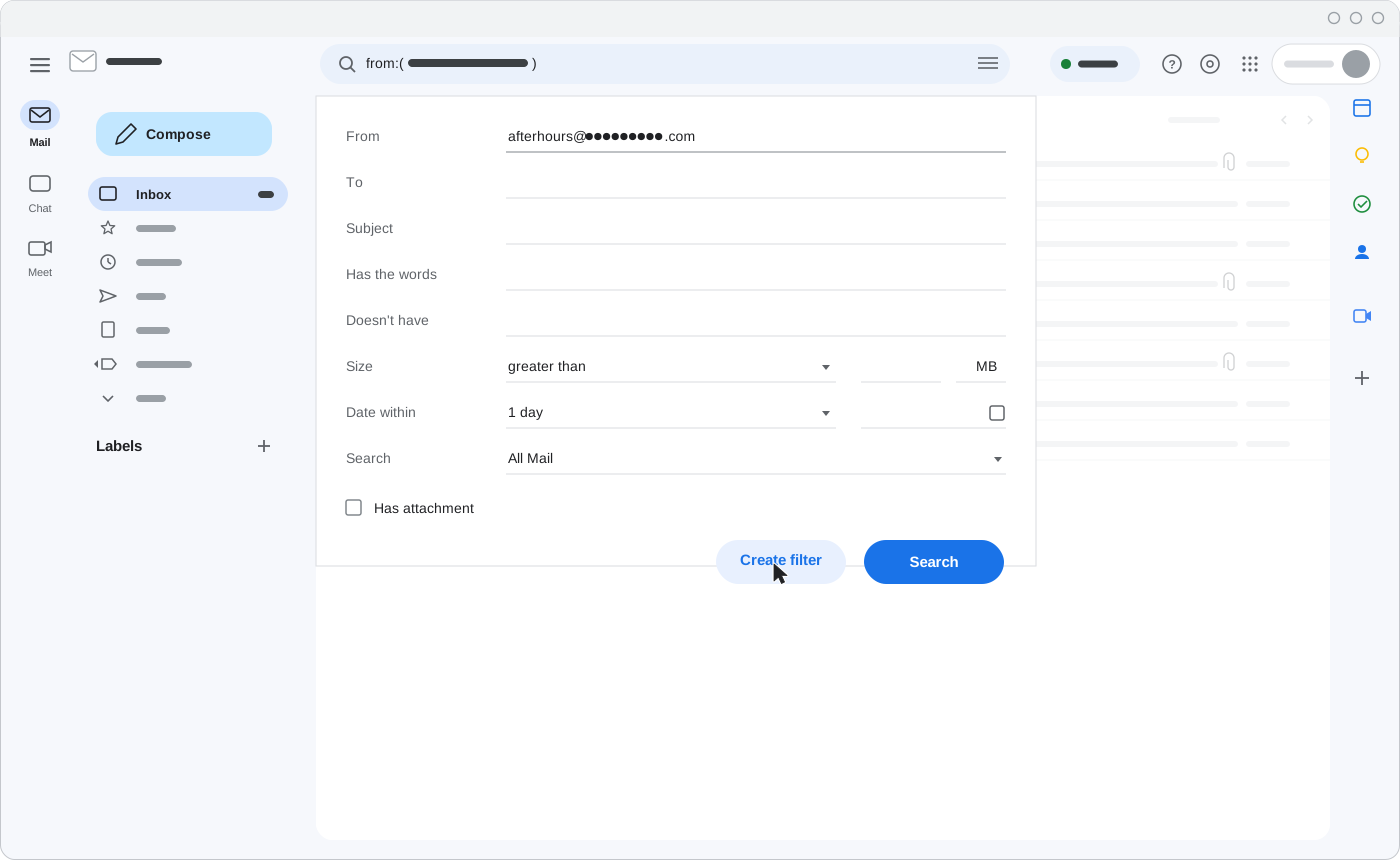
  1. Click Show search options (slider icon) in the search box.

  2. In From, type the sender's email address.

  3. Click Create filter.

01_search_options_create_filter.svg


2

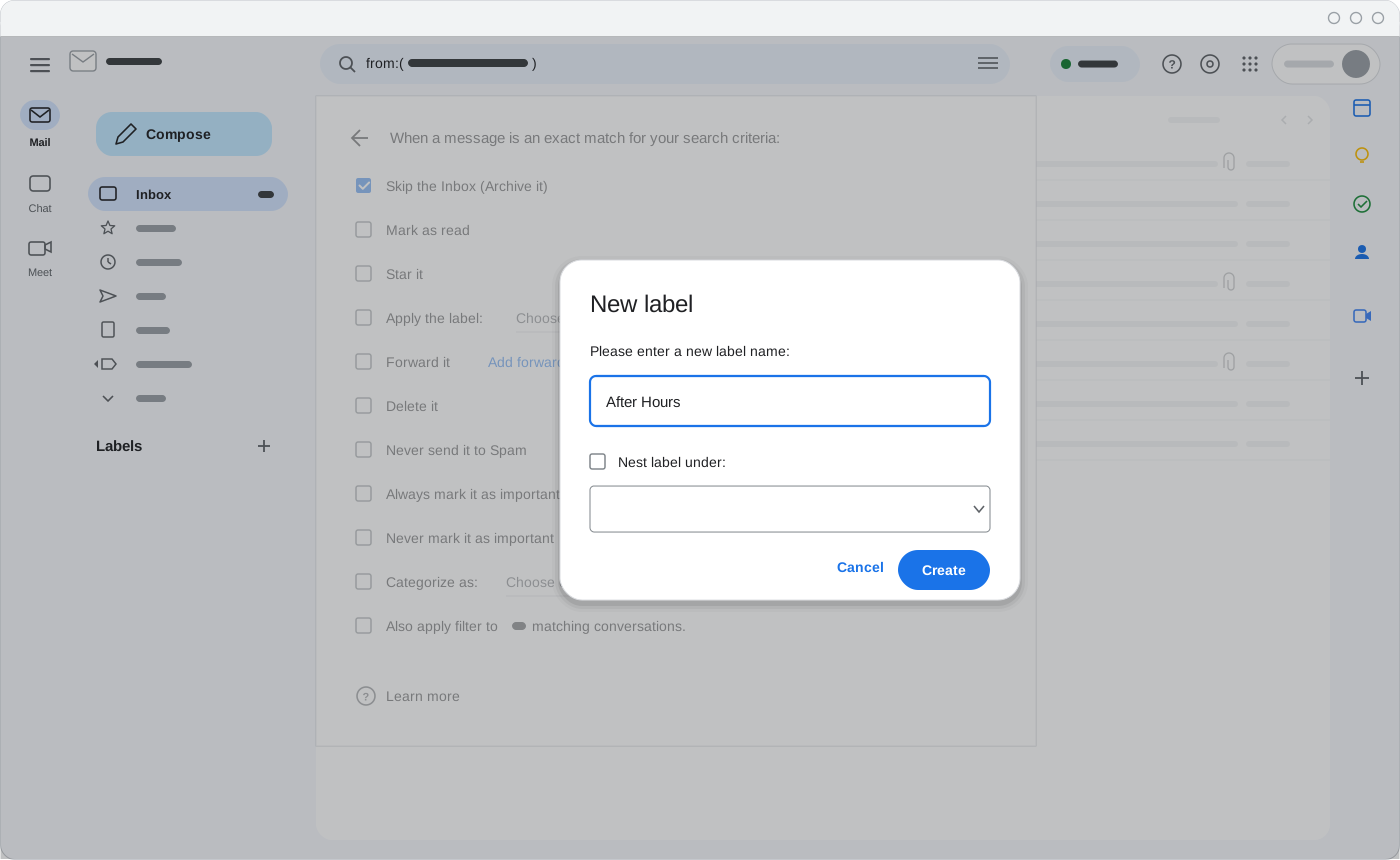
  1. Tick Apply the label → open the list → New label…

  2. Type a name. Example: After Hours.

  3. Click Create.

02_new_label.svg


3

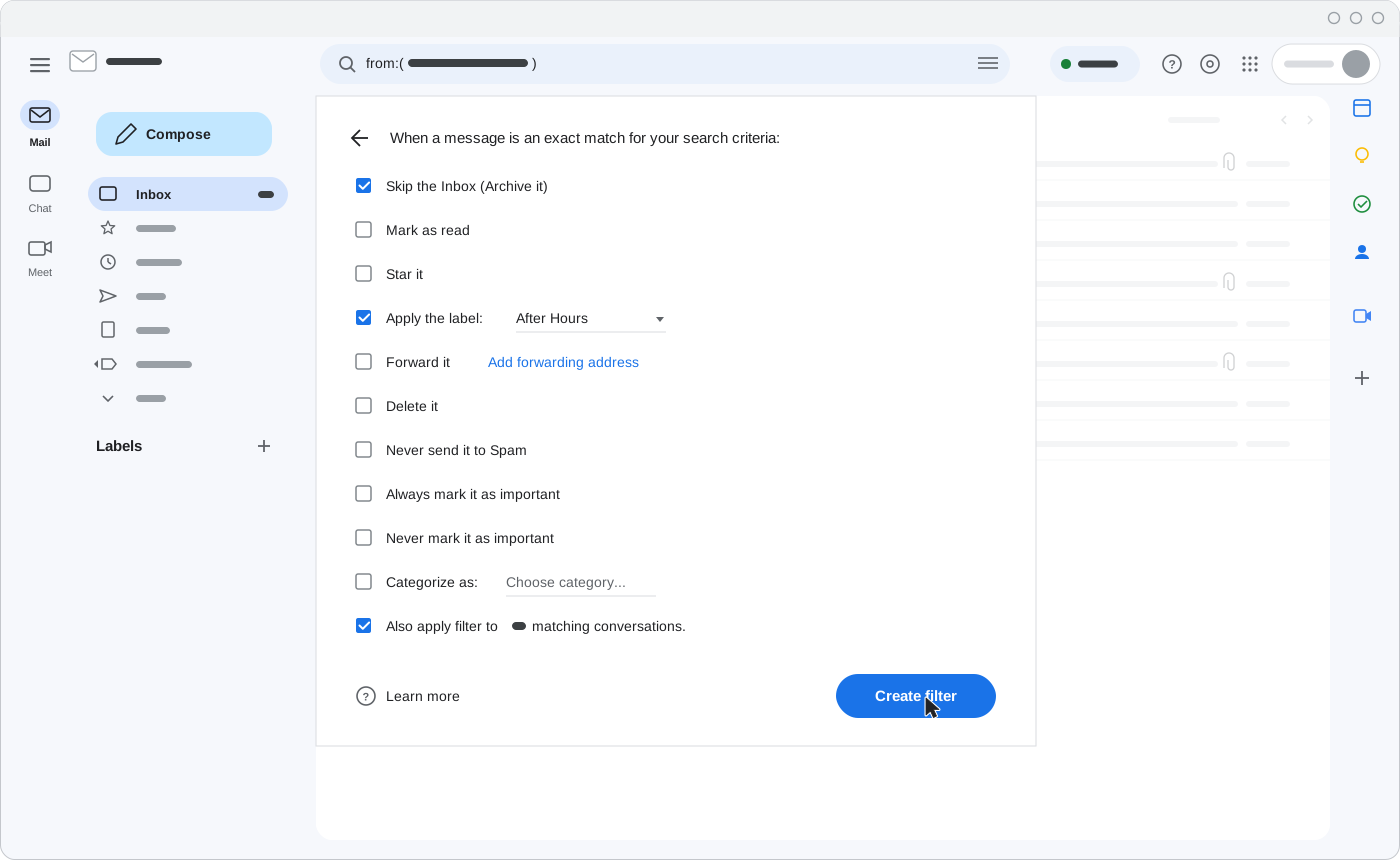
  1. Tick Skip the Inbox (Archive it).

  2. Tick Apply the label – your new label is selected.

  3. Optional: tick Also apply filter to matching conversations to move old emails too.

  4. Click Create filter.

03_filter_actions.svg


4

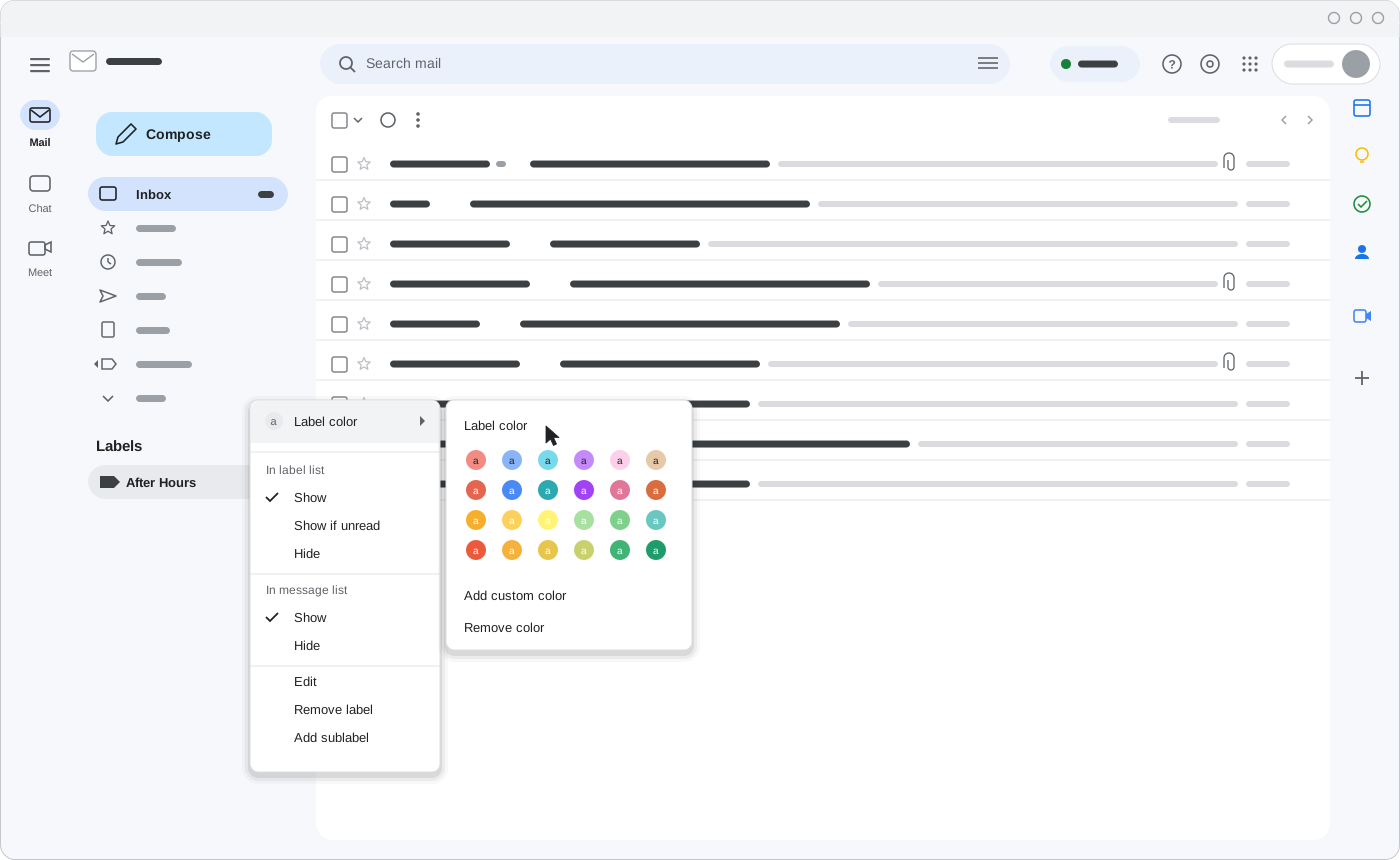
  1. In the left menu, hover over the label → click the three dots.

  2. Click Label color → pick a colour.

04_label_color.svg


5

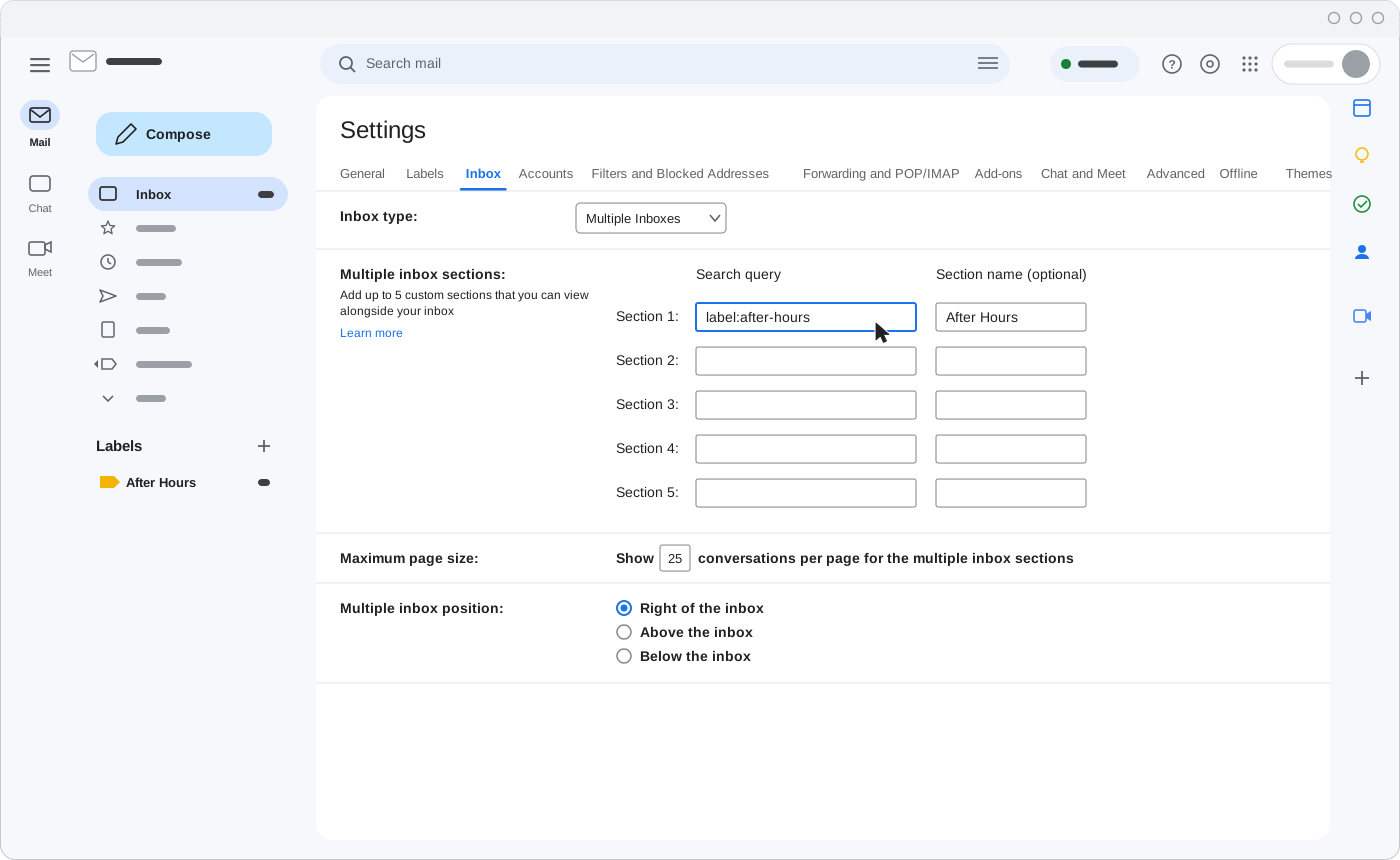
  1. Click Settings (gear) → See all settings → Inbox tab.

  2. Inbox type: choose Multiple Inboxes.

  3. Section 1 search query: label:after-hours (use hyphens for spaces).

  4. Section name: After Hours.

  5. Position: Right of the inbox.

05_settings_multiple_inboxes.svg


6

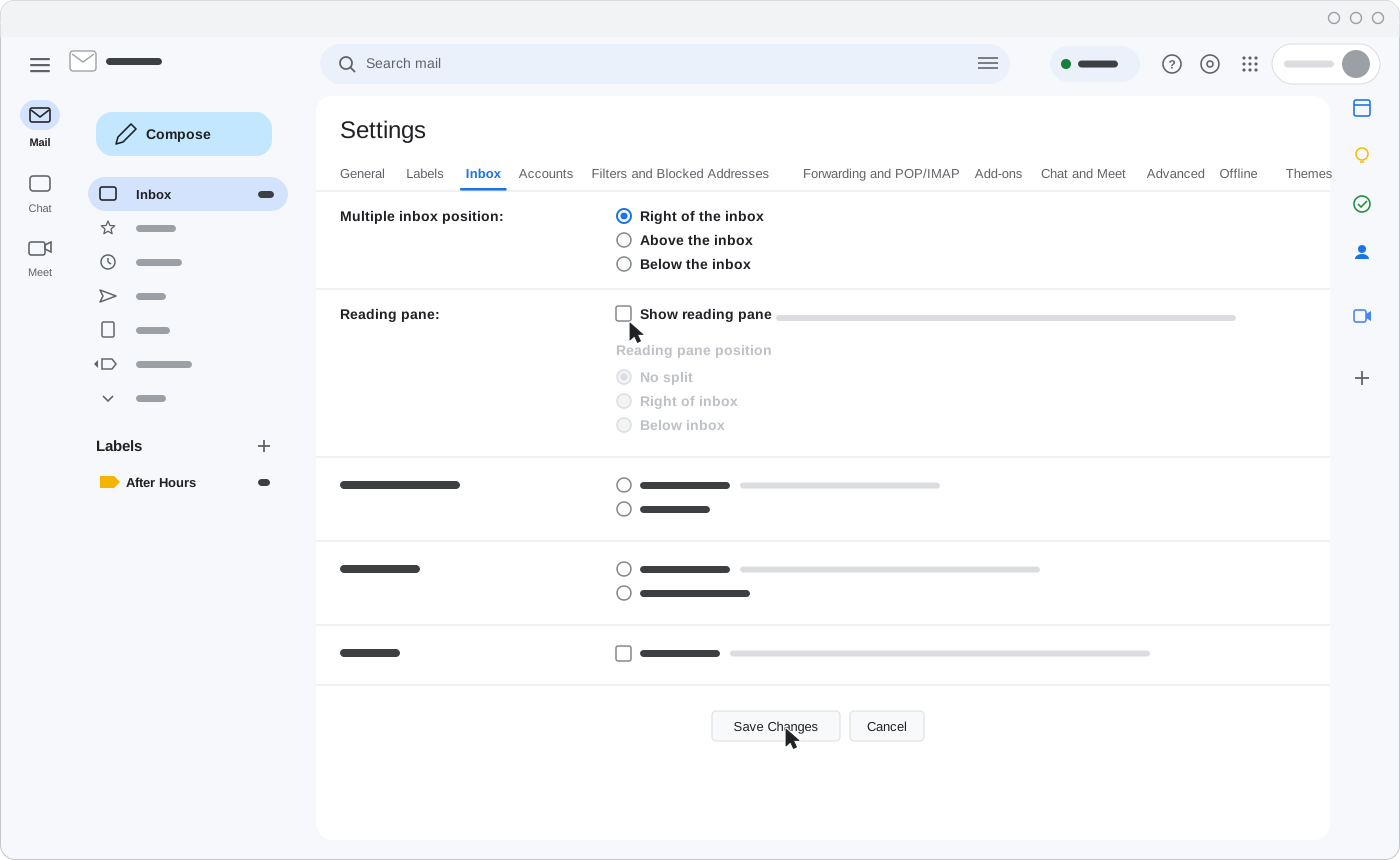
  1. Scroll to Reading pane. Untick Show reading pane. (Gmail cannot show it together with Multiple Inboxes.)

  2. Click Save Changes.

06_settings_reading_pane_save.svg


7

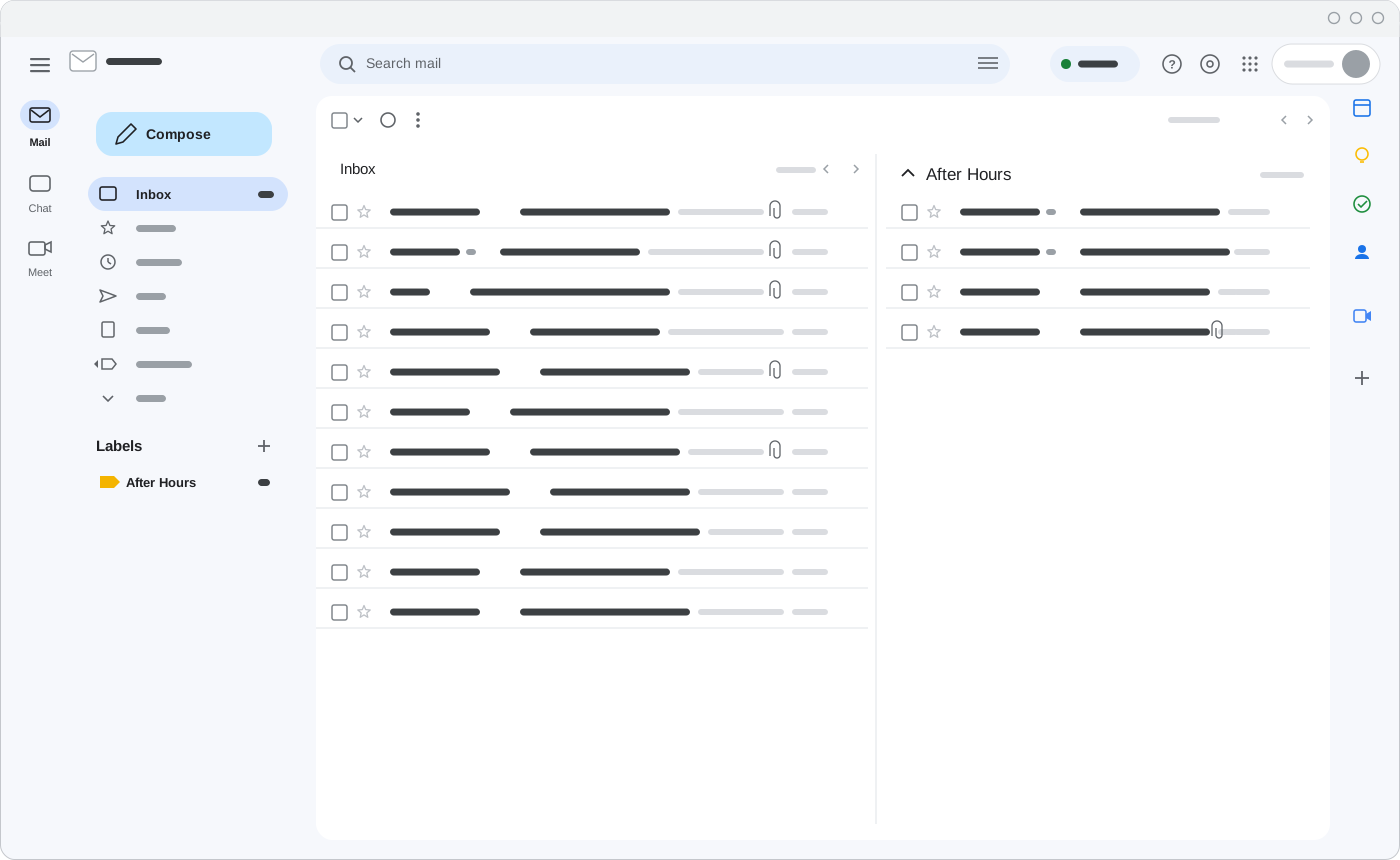
Gmail reloads. Your Inbox is on the left, your new section on the right. New emails from that sender go straight to the section.

07_result.svg